“Make it work with AI” is the request that lands on your desk with a thud and no
further detail. The first time it landed on mine I braced for a treadmill of
integration work: an adapter for this assistant, a wrapper for that one, one per
client, forever. Then I looked at the hello command we built back in
part 1.
It has a name, a one-line description, and (once you give it some) typed,
documented flags. That is exactly the shape an AI agent needs to call a tool.
You already did the hard part.
This part wires that up: turning the CLI you’ve been building into something an AI assistant can drive, with no AI code of your own. The how-it-works behind it is in your CLI is already an AI tool; here we just use it.
A version note, as in the earlier parts: this is written against
go-tool-base v0.6.0 (gtb version). The tool is young and moving, so if
you’re on a newer release and a command or its output has shifted, check there
first.
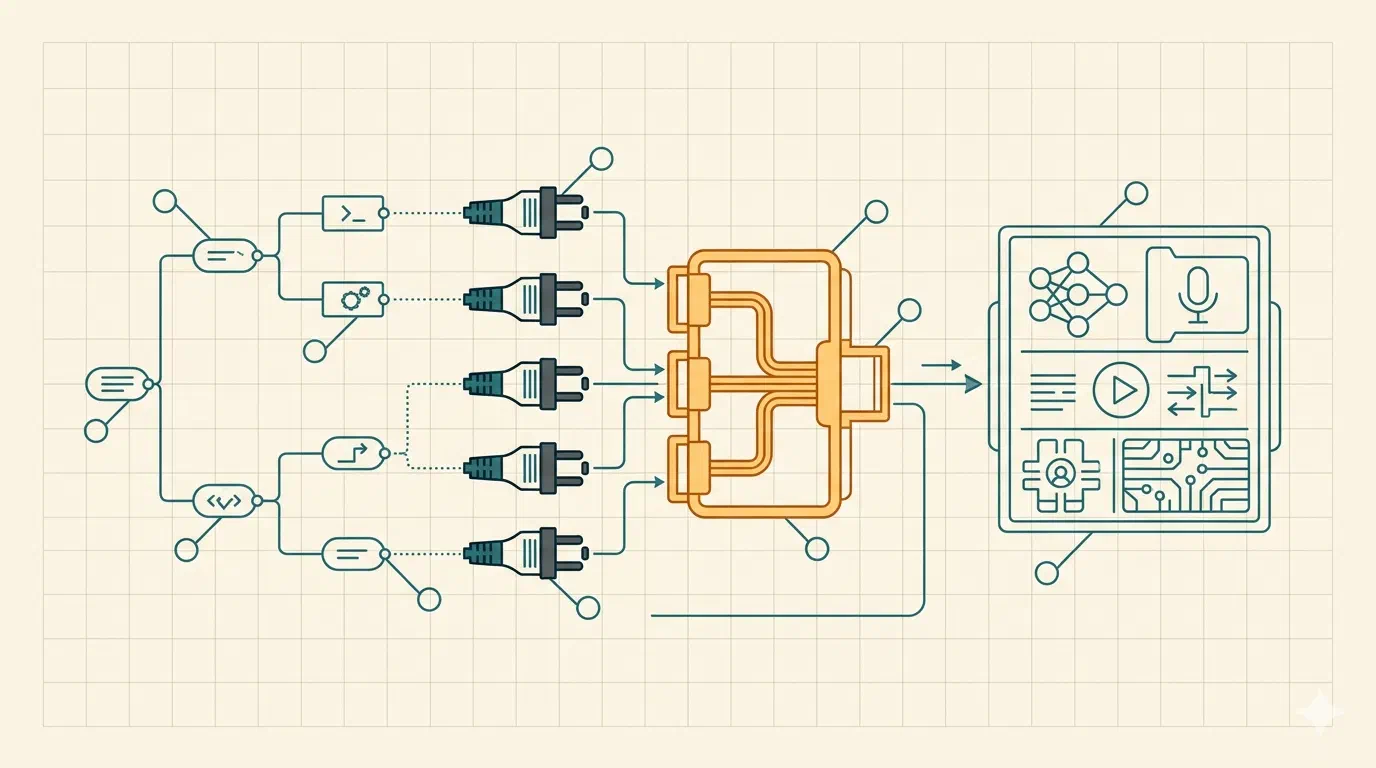
The translator you already have
An AI agent that wants to call local tools needs three things: a list of named operations, a description of each so it knows when to reach for them, and a typed parameter schema for each so it knows how to call them. A good CLI is already all three. The only missing piece is a translator between “this is a CLI” and “this is a set of tools an AI can call”, and that translator is the Model Context Protocol (MCP), an open standard every serious assistant now speaks.
Your tool already ships it. mcp is one of the default features, so it’s been in
your binary since you scaffolded in part 1, no flag required. Check:
./bin/mytool mcp --help
You’ll see subcommands you never wrote. The rest of this part is just three of them.
See what the agent sees
Before you connect anything, look at what your tool would expose. This writes the tool definitions to a file:
./bin/mytool mcp tools
{
  "tools": [
    {
      "name": "mytool_hello",
      "description": "Say hello",
      "inputSchema": {
        "type": "object",
        "properties": {}
      }
    }
  ]
}
That’s your hello command, seen from an agent’s side of the glass. The name is
your tool’s name and the command path joined with an underscore; the description
is the Short you gave it in part 1; the inputSchema is empty because hello
has no flags yet. Add a flag and it shows up here as a property, with the type and
help text you already wrote. There’s no second schema to keep in sync, because the
command tree is the schema.
A few things are deliberately left off this list: hidden and deprecated commands,
pure command groups that don’t do anything themselves, and the mcp, help and
completion plumbing. So mcp tools doubles as an audit: it’s exactly what an
agent can reach, and nothing else.

Run the server
One command turns the whole thing on:
./bin/mytool mcp start
It doesn’t print a banner and march off doing things. It sits quietly, speaking
MCP as JSON-RPC over standard input and output, waiting for an assistant to talk
to it. You won’t run this by hand much; the assistant launches it for you. But
it’s worth knowing what happens when the agent calls one of your tools: the server
re-runs your own binary with the arguments the agent supplied, captures the output,
and hands it back. The agent isn’t poking at your internals. It’s running
mytool hello, the same command a human would, and getting the same result.
Point an assistant at it
The quickest way is to let the tool write the client config for you. For Claude Desktop:
./bin/mytool mcp claude enable
There are cursor and vscode variants too. Restart the assistant and your CLI
is in its toolbox.
If you’d rather wire it by hand (or your client isn’t one of those three), the
config is small. Point the client at your binary with mcp start as its
arguments, using the absolute path:
{
  "mcpServers": {
    "mytool": {
      "command": "/absolute/path/to/bin/mytool",
      "args": ["mcp", "start"]
    }
  }
}
Claude Desktop keeps that in claude_desktop_config.json (under
~/Library/Application Support/Claude/ on macOS, %APPDATA%\Claude\ on Windows);
Cursor uses ~/.cursor/mcp.json; VS Code’s Copilot reads
github.copilot.mcpServers in your settings. The shape is the same everywhere.
From here, ask the assistant to say hello and watch it call mytool_hello.
The agent’s reach is exactly your CLI’s reach
This is the part worth being calm about. Exposing your CLI over MCP doesn’t widen
its surface by an inch. The agent can call the commands you shipped, with the
parameters you defined, and nothing else. It can’t invent a command or pass a flag
you never wrote. The boundary of what it can do is the boundary you drew when you
built the tool, and mcp tools shows you that boundary in full. If there’s a
command you don’t want an agent touching, mark it hidden and it drops off the list.
For a long-running or remote setup there’s also ./bin/mytool mcp stream, which
serves the same tools over HTTP instead of stdio; the
mcp reference has the details. For most
desktop assistants, start over stdio is all you need.
What it comes down to
You turned the CLI you’ve been building into an agent-callable tool with one
command and zero lines of AI code, because the real work, naming your operations
and documenting their inputs, you finished the moment your --help was any good.
Every command you add from here is a new tool the agent gets for free.
Next part goes the other way: instead of letting an assistant drive your tool from
outside, we put AI inside it, wiring up a provider and building a feature against
go-tool-base’s chat SDK. Until then, add a command or two and watch them appear in
mcp tools. The agent’s toolbox grows as your CLI does.